Guide for Creating your Print File
Artwork Assistant
Welcome to the Artwork assistant. Fast and efficient processing of your order is particularly important to us. That's why we're providing you with the artwork assistant tools. First is a file checker. A tool that will check if your file is set up correctly. If not, then our dieline generator will provide you with a design ready dielines and spot colors to help creating a print ready file in no time.
File checker
Check if your files are print ready.
Simply write the size of your label and the number of sorts. Please note, if your artwork has Hotfoil or Opaque white option, check box needs to be checked.
You can upload one file or more files at the time. Each file will show in the panel under and it´s status. There are two status messages. either your file is printable and our Preflight found no mistakes so you can proceed with your label order or the Preflight found some errors and your file needs to be revised or you can Book a Artwork Service.
Dieline generator
Simply write the size and the shape of your label. If your artwork contains a Opaque white elements and Foil stamping, please check the check box. We will generate the die-cut lines and place the spot colors in one file which we will send to you through email
Open Print Template:
Open the AI template from your email inbox using a vector graphics program, such as Adobe Illustrator. The file is created in the specified size you specified
including a surrounding bleed of 2.5mm. If you have selected the label shape “square” or “round”, the punch contour (magenta) is already in the end format in the file . If you have selected the “own shape” option, this is created as an individual shape in the document as a
placeholder. You can create a custom die in Adobe Illustrator using the pen tool. It is important that you color the punch outline in the spot color “stamp” from
the Window > Swatches panel.
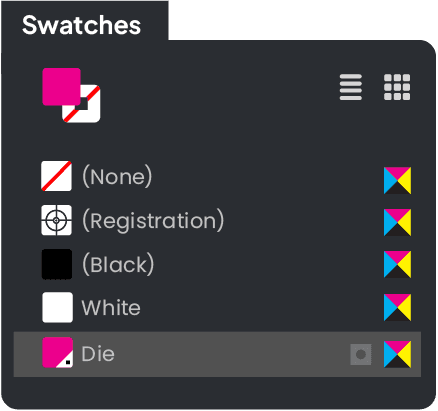
Colourise Faces to Spot Colour:
Colour all vector elements to be further processed with the corresponding spot colour from the Window > Colour Fields control panel. To do this, select the different elements in Adobe Illustrator with the selection tool in the Tools panel and colour, for example, with the spot colour field “Foil”.
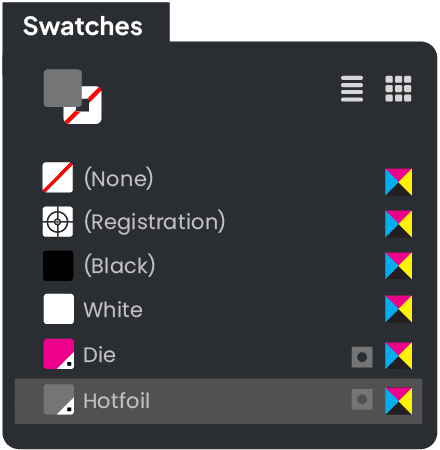
Move Elements to Layer
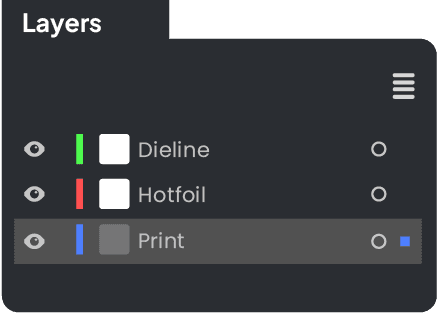
Now drag the elements coloured with the technicolour, e.g. “Foil”, to the corresponding Window > Layers. To do
this, select the elements with the selection tool in the tool panel. Then drag the square to the corresponding layer.
Set Technical Colours to Overprint
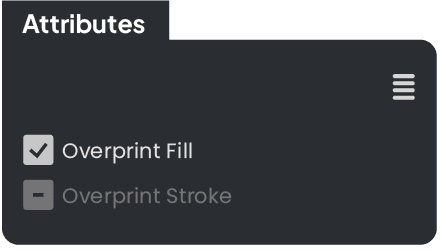
The elements that you have coloured in the respective technical spot colour (such as “Foil”) must now be adjusted to the overprint. To do this, select these elements with the selection tool (in the tool panel) and open the attributes panel in the window. Under Surface click on the overprint option. For a contour line, select the Overprint contour option. The “overprint” option makes the areas under the object to be overprinted continuous and not recessed.
Check Colours Using Separations Preview
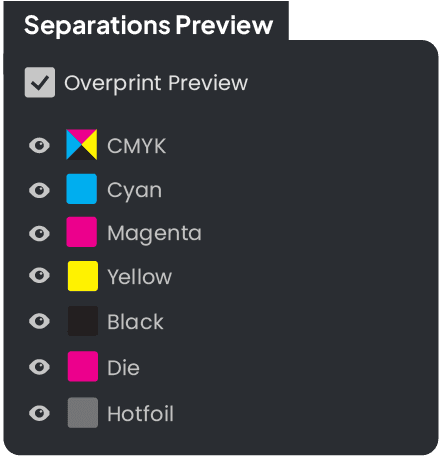
To check whether the settings are as desired, open the window > Preview separations in the control panel. To
check the colour separations, check the Overprint preview box.
You can then use the hide and show options to separate the individual colours that are present in the document for your verification.
Export Finished Print File as PDF
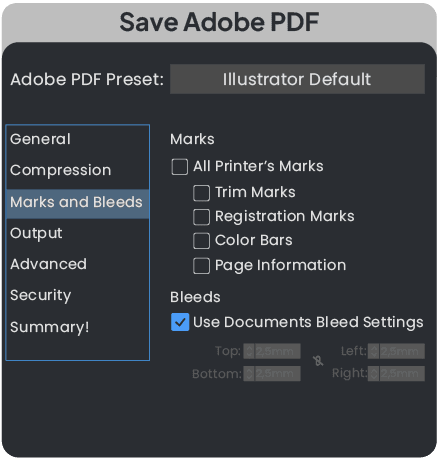
Once all the colours have been correctly created, the PDF can be exported for printing. To do this, select the option > Save as …. in the bar at the top under File. A window will then open in which you can name the file and select a saving location. In addition, select the file type Adobe PDF (pdf) in the Format option. Then click on
the Save button. In the window that opens, set the Adobe PDF preferences to [High Quality Print]. In the Marks and Bleeds tab on the left side, click the Use document bleed settings checkbox. The previously set
bleed of 2.5 mm all around should appear automatically. Finally, click the Save PDF button. Your print-ready PDF file is now saved in the folder you selected earlier.
